
You’ve likely heard about DIY crawlspace waterproofing and its potential to save you some bucks. However, you can’t help but wonder – does it actually work? Can you really achieve professional-grade results with a do-it-yourself approach? The truth is, it’s not as straightforward as it may seem. While some homeowners have successfully waterproofed their crawlspaces, others have encountered a myriad of problems down the line. So, before you grab your tools, let’s explore this further. What exactly determines the success or failure of a DIY waterproofing project?
Key Takeaways
- DIY crawlspace waterproofing can work effectively, but it requires careful preparation and application of waterproofing materials.
- The success of DIY waterproofing is dependent on the homeowner’s skill, understanding of the process, and use of appropriate tools.
- Common mistakes such as inadequate surface preparation and incorrect sealant application can compromise the effectiveness of DIY waterproofing.
- Even successful DIY waterproofing may not address all moisture sources, like condensation and groundwater, requiring comprehensive solutions.
- Long-term monitoring and evaluation are critical to ensure the effectiveness of DIY waterproofing and to identify potential moisture problems.
Understanding Crawlspace Waterproofing
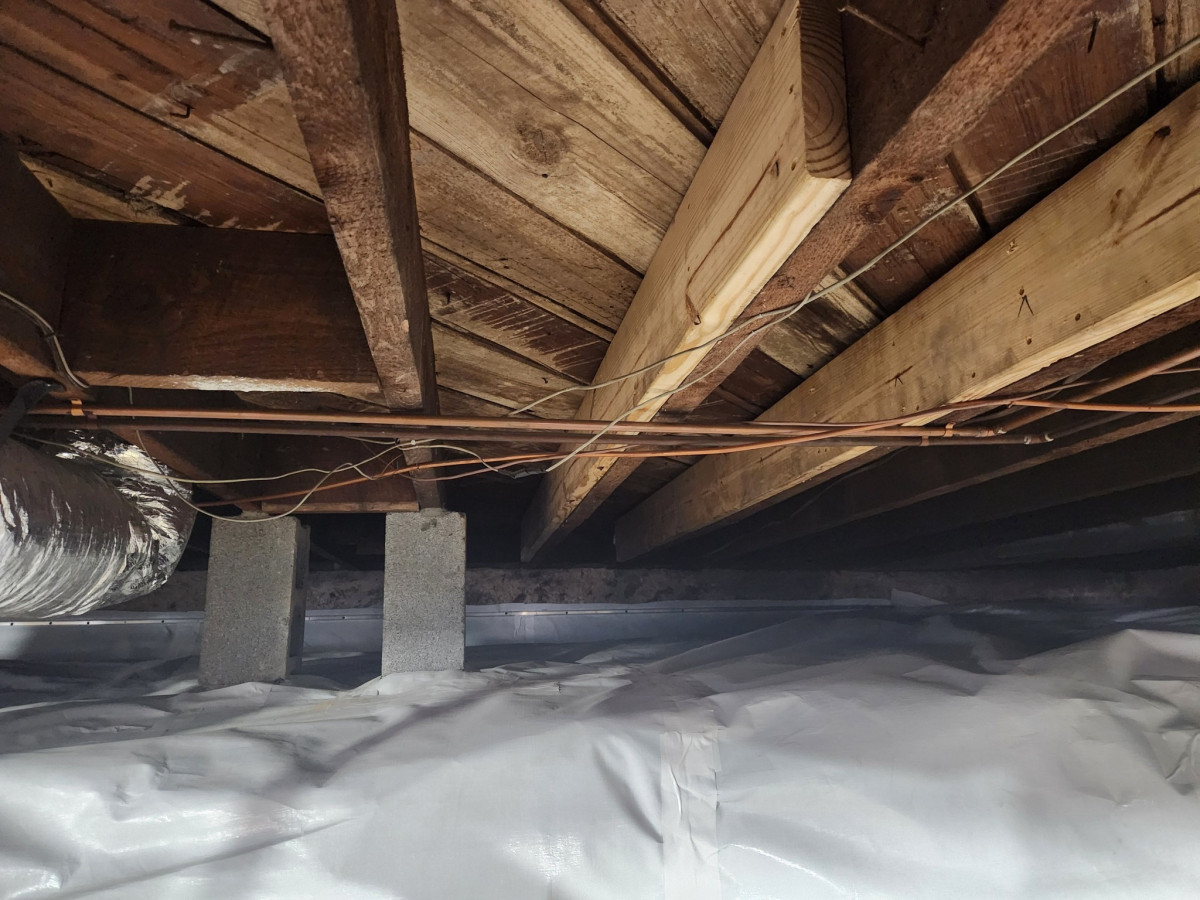
 Before we explore the nitty-gritty of the actual process, it’s crucial to understand what crawlspace waterproofing entails. It’s a method designed to prevent water from seeping into your crawlspace, the area beneath your house that often houses essential utilities.
Left unchecked, water infiltration can lead to a host of problems, including mold growth, structural damage, and poor indoor air quality.
You might wonder, “Why should I care about a part of the house I barely visit?” Well, an unattended, damp crawlspace can affect the entire structure of your home, and by extension, your comfort and health.
Moisture encourages mold growth which can spread to other parts of your house, potentially causing allergic reactions and respiratory issues. Additionally, the moisture can weaken your home’s foundation over time, resulting in costly repairs.
DIY Vs Professional Services
After understanding the importance of crawlspace waterproofing, you might be weighing the options between tackling the job yourself or hiring professional services. Both paths have their merits and drawbacks, depending on your situation.
If you’re a seasoned DIY enthusiast with a knack for home improvement tasks, doing it yourself might be an appealing option. You can save on labor costs, work at your own pace, and get the satisfaction of a job well done.
However, it’s not without its challenges:
- You’ll need to spend time learning about the right techniques, which can be complex and time-consuming.
- Mistakes can lead to further damage and costly repairs.
- It can be physically demanding and require specialized tools.
On the other hand, hiring professionals can provide peace of mind. They’ve the training, experience, and tools to do the job right the first time.
Yes, it’ll cost more, but you’re paying for expertise and saving yourself potential headaches down the line.
Weigh these factors carefully before making your decision. After all, a well-protected crawlspace isn’t just about avoiding water damage; it’s about the comfort and safety of your home.
Necessary Tools for The Job
Once you’ve decided to tackle the crawlspace waterproofing job yourself, it’s critical to arm yourself with the necessary tools. You wouldn’t want to start your project and then find out you’re missing essential equipment. So, let’s get you prepared.
First, you’ll need a good pair of gloves. These will protect your hands from rough surfaces and any potential harmful substances. Safety glasses are also a must to safeguard your eyes from dust and debris.
Don’t forget a sturdy ladder; you’ll need it to access your crawlspace. A flashlight will come in handy to illuminate dark corners, along with a moisture meter to identify the areas most prone to dampness.
You’ll also need a good quality sealant and a sealant gun. This is what you’ll use to waterproof your crawlspace. A strong, durable brush will be necessary to apply the sealant evenly.
Lastly, be sure to have a set of hand tools, like a hammer and screwdriver, and some cleaning supplies. You’ll need to clean the area before starting the waterproofing process.
Now that you’ve got your tools, you’re ready to start. Remember, good preparation is half the battle won.
Step-by-Step DIY Waterproofing Process
Now that you’re familiar with the tools needed, let’s move on to the step-by-step process of DIY crawlspace waterproofing.
First, we’ll discuss the basics of waterproofing to guarantee you’re well-equipped for the task.
Then, we’ll go over the materials you’ll need and explain the procedure in detail.
Understanding Waterproofing Basics
Diving into the basics of waterproofing, it’s essential to understand the core principles before starting your DIY crawlspace waterproofing project. Waterproofing is a preventive measure that aims to stop water from penetrating your crawlspace. Water can cause serious structural damage, mold growth, and other problems, so it’s critical to keep it out.
Firstly, you need to know that waterproofing involves more than just applying a sealant. It’s a multi-step process requiring attention to detail to guarantee no leaks are missed. Here are three broad steps involved:
- Identifying the source of water
- Preparing the area for waterproofing
- Applying the waterproofing method
Identifying the source of water is fundamental. You can’t effectively waterproof your crawlspace if you don’t know where the water’s coming from.
Preparation involves cleaning and drying the area, making sure it’s free from debris that could interfere with the waterproofing process.
Applying the waterproofing method involves choosing the right solution for your specific problem. There are various methods available, depending on the nature of the water intrusion.
Understanding these basics will set you on the right path to effectively waterproof your crawlspace. With the right knowledge, your DIY project can be a success.
Necessary Waterproofing Materials
Before you plunge into waterproofing your crawlspace, you’ll need to gather the necessary materials. These include a waterproofing membrane, a sump pump, a dehumidifier, and waterproofing paint or sealant. You’ll also need basic tools like a shovel, gloves, measuring tape, and a paint roller or brush.
The waterproofing membrane is essential. It’s a sheet that you’ll lay over the crawlspace’s floor and walls to block out moisture. You might find different types, such as liquid, sheet-based, or cementitious membranes, each with its pros and cons. Choose wisely according to your crawlspace conditions and budget.
The sump pump is another important element. It collects water that enters the crawlspace and pumps it outside. Make sure to select a reliable, high-capacity model that can handle the expected volume of water.
Next, the dehumidifier. It’ll help maintain the right humidity level in your crawlspace, preventing mold and mildew growth.
Lastly, the waterproofing paint or sealant. This creates an extra layer of protection against moisture. Choose a product designed for use in damp areas and follow the manufacturer’s instructions carefully.
Waterproofing Procedure Explained
With all the necessary materials in hand, you’re ready to tackle the task of waterproofing your crawlspace. It’s a straightforward process that you can break down into three main stages:
- Initial preparation
- Applying the waterproofing layer
- Final checks and clean-up
During the initial preparation, you’ll need to clean the crawlspace thoroughly. Remove any debris, dust, or cobwebs that could interfere with the waterproofing layer.
It’s also crucial to fix any noticeable cracks or leaks in the walls or floor.
Next, you’re set to apply the waterproofing layer. Use a roller or brush to evenly spread your chosen waterproofing product on the walls and floors of your crawlspace.
Don’t rush this process. You want to make sure you’ve covered every nook and cranny.
Finally, after the waterproofing layer has dried, it’s time for final checks and clean-up. Inspect the crawlspace to make sure the waterproofing layer is intact, with no missed spots.
Clean up your tools and dispose of any leftover materials responsibly.
Common DIY Waterproofing Mistakes
While you’re enthusiastic to get your crawlspace waterproofed, it’s essential to watch out for common missteps that can compromise your hard work.
You might be overlooking key errors such as inadequate surface preparation, incorrect sealant application, and ignoring moisture sources.
Let’s discuss these typical DIY waterproofing mistakes to guarantee your project is a success.
Inadequate Surface Preparation
Often, one might overlook the importance of properly preparing the surface before waterproofing a crawlspace. This can lead to a host of issues, including ineffective waterproofing and potential damage to your home’s foundation.
You see, the condition of your crawlspace surface plays a vital role in the success of your waterproofing project.
Inadequate surface preparation may manifest in several ways:
- Neglecting to clean the surface: Dust, dirt, or debris left on your crawlspace’s surface can interfere with the adherence of waterproofing materials. It’s essential you thoroughly clean the area before application.
- Ignoring cracks and holes: If you don’t fill in cracks and holes before waterproofing, water can seep in, defeating the purpose of your efforts.
- Not allowing the surface to dry: Applying waterproofing materials on a damp or wet surface can compromise their efficacy. Always verify your crawlspace is dry before you begin.
Incorrect Sealant Application
Even after perfect surface preparation, your crawlspace waterproofing can still falter if you apply the sealant incorrectly. It’s a common DIY mistake that can have significant consequences. Here’s what you should know.
Firstly, applying too little sealant won’t provide the necessary coverage to keep water out effectively. It might seem like you’re saving money by using less product, but in reality, you’re just creating a path for water to seep into your crawlspace. So, don’t skimp on the sealant.
On the flip side, using too much sealant isn’t a good idea either. Over-application can lead to uneven drying and curing, resulting in a weak seal that doesn’t protect as it should. It’s crucial to strike a balance – apply enough sealant to cover the area thoroughly, but not so much that it becomes a problem.
Moreover, always pay attention to the manufacturer’s instructions on the product. These guidelines are there to guarantee optimum performance. Ignoring them can result in ineffective waterproofing.
Lastly, the type of sealant matters. Not all products are created equal. Some are better suited for certain conditions than others. Always research and choose the right one for your specific needs.
Ignoring Moisture Sources
One of the most common blunders in DIY crawlspace waterproofing is overlooking sources of moisture. You might think you’ve sealed every crack and crevice, but if you’re not addressing the root of the problem, all of your hard work may be for naught.
Common moisture sources often ignored include:
- Condensation: This can result from poor ventilation, leading to dampness in your crawlspace. It’s vital to guarantee sufficient air circulation to prevent this issue.
- Groundwater: If the soil around your home is of a type that retains water, it might be contributing to your moisture problem. Proper drainage systems are essential in this case.
- Leaking pipes: Hidden or ignored, these could be a primary source of moisture. Regular inspection and maintenance of your house’s plumbing system is a must.
Evaluating the Effectiveness of DIY Waterproofing
Trust plays a notable role when you decide to undertake a DIY crawlspace waterproofing project. You’re not only placing faith in your skills but also in the effectiveness of the solution you’ve chosen.
So, how can you evaluate the success of your DIY efforts?
First, consider the symptoms of moisture issues you were trying to address. Have they disappeared or reduced considerably? If the musty smell has faded, mold growth has stopped, and your crawl space feels less humid, these are positive signs that your waterproofing attempt was successful.
Next, look at the condition of your crawlspace after a heavy rain. If there’s no standing water or damp spots, that’s another good indication.
However, don’t be too quick to pat yourself on the back. Some issues mightn’t be visible immediately. Long-term evaluation is essential, so keep a watchful eye for any signs of moisture over time.
While DIY waterproofing can be cost-effective and satisfying, remember that not all issues can be tackled this way. You might’ve to call in professionals for severe cases.
In the end, it’s about protecting your home and ensuring it’s a safe, healthy space for everyone.
Risks and Benefits of DIY Waterproofing
Tackling DIY crawlspace waterproofing comes with its share of risks and rewards. On the one hand, you’re in for potential cost savings and the satisfaction of doing it yourself. But there are hazards too.
On the bright side, DIY waterproofing can:
- Save you money in labor costs.
- Allow you to work at your own pace.
- Give you a sense of accomplishment when it’s done.
However, you should also be aware of potential pitfalls. Waterproofing your crawlspace is a complex task. If not done properly, you could end up with more problems than you started with. These could include structural damage, mold growth, or even health issues caused by dampness and poor air quality.
Also, you mightn’t have all the necessary equipment or expertise. Waterproofing requires specific tools and materials, and the know-how to use them effectively. If you’re not careful, you could easily end up spending more on tools and fixes than you’d have on a professional service.
In the end, the choice is up to you. Weigh the risks and benefits carefully before diving in.
So, does DIY crawlspace waterproofing work? Absolutely, if you’re meticulous and well-prepared. You’ll need the right tools and know-how, plus a keen eye for common mistakes. But remember, DIY isn’t necessarily best for everyone. It’s a balancing act between saving money and ensuring quality. If you’re unsure, professional services may be a safer bet. Ultimately, understanding moisture control is key. So, weigh the risks and benefits carefully before diving in.